First off - I should say I am all for body hair. It grows there, why not let it stay? I usually leave my legs and armpits to grow to a certain length. (I do keep my armpit hair trimmed, but I find I really prefer hair there). However sometimes, the smoothness of hairless legs can be so very sensual and pleasant to the touch. So every now and then, I do get my legs professionally waxed. This might happen once or twice a year, and the last time was around new years eve, or 5 1/2 months ago. I've been feeling that smooth leg urge again. But, when I started looking up waxing salons on the net, up came up the sugar wax method. New to me, but now much loved! I find this method is easier, cleaner, more effective, and less painful than waxing. Even more, the ingredients are incredibly cheap and common, and this can all be done at home!
Sugaring (or Sugar Wax)
All you need is, well, sugar, lemon juice (or vinegar), and water. Plus some cornstarch to prep the skin. The most common recipe on the net is this:
2 cups white sugar
1/4 cup lemon juice
1/4 cup water
I had all of these things in the house already, so straight away, I gave it a try. First, to make the sugar wax, this is what I did...
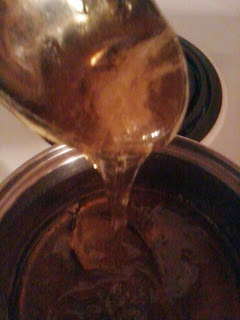
1) Mix the ingredients in the pot, and place over high heat on an electric stove element, stirring occasionally. Check out
this site Part 1 and
Part 2 for a video of the cooking process.
2) When the mixture starts to bubble, turn the heat down to low/medium and stir continuously.
3) Every now and then, take the pot off the heat, let the bubbles subside, and check the colour of the sugar. When done it will be a rich golden amber colour.
***I also kept track of the temperature, you're meant to bring the temperature
up to 250 deg F, at that point the sugar should reach the right consistency when
cool. I didn't have a thermometer that went high enough, so I brought the
temperature to at least 200F, and kept it on the stove for about 5 minutes more.
4) After 5 - 10 minutes of bubbling, I noticed the bubbles became less bubbly, and more a heavy froth, with a golden colour. (Here I stopped the first time, and had to put it on the heat once again). I would recommend leaving it on the stove for about 5 more minutes once it reaches this point, making sure it does not burn.
 |
| Almost there... |
*** you can test the sugar, by running a spoonful of the mixture under warm
water, and then take the sugar glob and stretch it between your fingers.
It should stick and have a firm stretchiness.
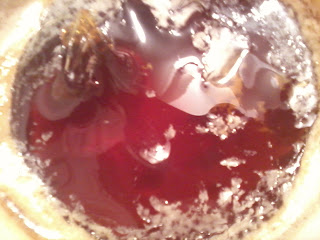 |
| The Finished Sugar Wax - Cooled |
5) Once done let cool - completely - or at least until it is almost room temperature. I find the sugar heats up in your fingers, so as long as you can get it from the container, it is best cooler than warmer.
Sugaring Time!
Once cool - you can start to sugar. Here is what I did...

1) Rub cornstarch over the skin to be sugared. This makes sure the surface is completely dry (important since the 'wax' is water soluble), and that the sugar won't stick to your skin.
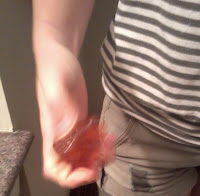 |
| Kneading the Sugar |
2) Take a ball of the sugar wax, about 2 tablespoons, and knead it between your fingers until it get a golden/white candy sheen.
3) Rub the sugar wax onto the skin against the direction of hair growth.
4) In a sharp, quick movement, pull the sugar wax parallel to your skin, I found the closer, and more parallel this movement, the better the hair removal was.
This Site has a great video to show the proper technique.
5) repeat steps 3 and 4 on the next patch of hair, continue until done, or the sugar becomes unworkable.
 |
| Rubbing the sugar onto the leg |
It will after a while, for me half a leg or so, become too soft and sticky, and stopped pulling away from the skin. At this point, just get a new ball of sugar, and continue...
After a while, I started to get into the rhythm, and it became very fast and kinda (tho still very sticky) easy. I know I will get better technique over time. And its nice to know, if I ever have a hairless urge, I can just walk to the kitchen and go from there.
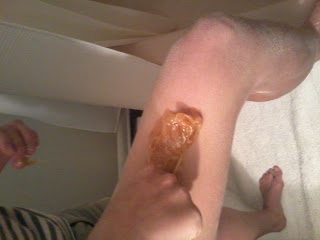
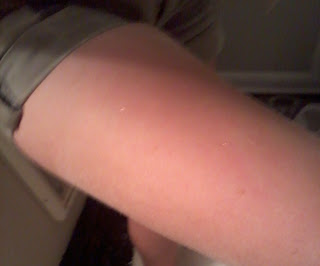 |
| Super Smooth, and Freshly Hairless Leg |
***much thanks to all the websites which gave me great info on this project,
and to my Mom for the providing of the materials and photography :)
websites used;
Video; Sugaring for Hair Removal - Nina's Technique (You Tube),
Beauty Woo Me DIY Sugar Wax,
Oriental Epilation (You Tube),
Making Sugar Wax and Using it (You Tube),
Fox TV review of Alexandria Sugaring,
Sugar Waxing with strips and remedies for sticky wax (You Tube),
Sugaring Hair Removal 101,
Do It Yourself Salon,
Wedding Bee DIY Sugaring,
Wikipedia - Sugaring (epilation)

 Earlier I posted about a pair of Hurrache style sandals I made a few weeks ago. I've been testing them out, in the country and the city, and they have done amazing, the leather has molded to the shape of the foot, and they've help up pretty well to concrete and water. I've even gotten used to walking in them, I found at first they confused my feet. You're walking as if you're barefoot, but the feet are protected from all the stones and rough ground. Eventually my feet understood and just went with it all.
 Lately I've been working with rubber soles on these latest pairs, and trying slight variations in the way they are put together. These photos are pairs 2, 3 and 4 for me, made for one of my favourite families here in Winnipeg.'They're going to test them out, and let me know how they go. I think they're starting to look pretty cute. Still a ways to go before I can start selling them, but I'm getting there.


.jpg)


